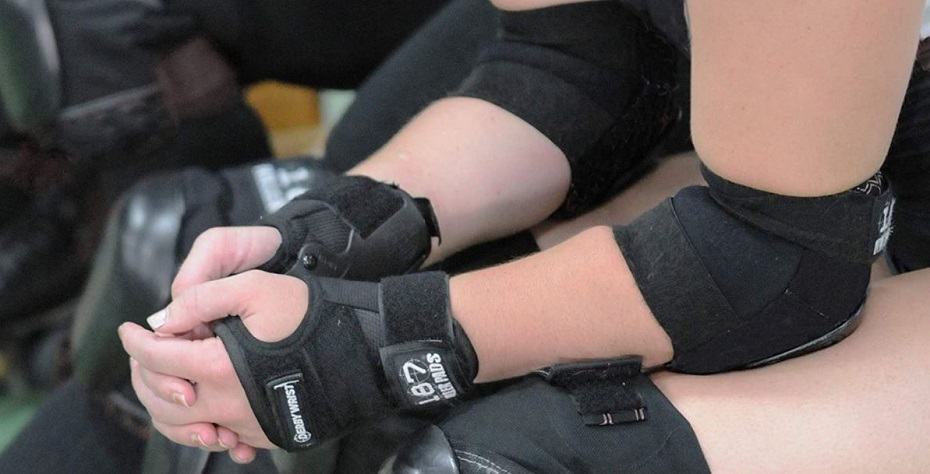
We all have heard that prevention is better than cure. For skating, it should sound like “Protection is better than cure.”
The reason behind it is that it will cost you so much time if you don’t protect your wrists when having fun. Additionally, the healing process kills your enthusiasm.
The injuries range from bruises, fractures to dislocations of joints. Experts suggest if you feel you are going to fall, you might want to land on fleshy parts rather than use your wrists. Still, protection is crucial as you cannot control where you land.
Thus, it is best to protect than sit back for months or maybe years. Knowing how to wear wrist guards for skating is necessary for proper safety with other protective gears. Here’s how you can do it yourself.
How To Wear Wrist Guards For Skating?
It is necessary and a must for beginners and older persons. The beginners are prone to falling.
As they haven’t mastered the falling style yet, the injury can be severe. As the learning progresses, skaters have more control over how they fall, and there is less damage.
Also, as you get older, your bones don’t heal at the same rate as they used to. So, if you take a hit at old age, it might take years to heal. Therefore, you might want to avoid injuries by wearing wrist guards which protect your bones.
Step 1: Choosing a comfortable and durable wrist guard.
The right wrist guard will provide you with proper protection. You know what type of tricks you are going to perform. Thus, choose a suitable guard for your wrists.
Step 2: Locate the thumb hole.
Knowing where the thumb hole is, makes your work that much easy. It indicates which one goes on which hand.
To make it simpler for you, the guard with the hole on the right side goes on the right wrist, and the hole with the hole on the left side goes on the left wrist.
Step 3: Hard side up!
The side with the hard and thick plastic resides on your palm. That hard plastic is called splints, and they absorb the shock when you fall. There is another splint that is at the back of the wrist guard.
Sometimes the front one is removable. It is so that it takes more damage and also can be replaced if it breaks or wears down.
The back of the wrist guard usually has the logo of the company to make it clear which side is the front. It makes the work easier for you.
Read: How do wrist guards work?
Step 4: Slide them on.
Slide the wrist guards on one after another. It is preferable to do one hand at a time. By doing this, you will have more control over the gear, and the output will be better.
Or,
If the guard is not a sliding system, you have to open it and lay your hand on the pad. Grip it and put your thumb through the hole. Then start the wrapping process.
Step 5: Wrap it around.
First, take the longer strap and wrap it around 360 degrees. Then attach the Velcro, which will not be much tight.
Then you take the shorter straps and tightly secure them in place on the Velcro. Now you undo the longer strap and pull it taut, making it snuggly tight to your wrists.
Step 6: Test it.
You have to make sure your hands and fingers are comfortable, and the grip is non-restricting. Also, they mustn’t be too loose as it will be inconvenient when skating.
Move your wrist around and fingers. If it feels alright, then just head outside.
Final Words…
To wrap it up, you always have to wear safety gear when attempting these types of sports. Especially if you are a beginner, you have to wear a wrist guard.
Skating has a higher chance of injury and can leave you with damages that you might not recover. Therefore, your protective measure will save you from an unpleasant situation.
There is no alternative to safety gear to keep the fun in the sport and danger, especially the wrist guard. Always remember that safety comes first!


Leave a Reply